Installing the Altium current default font may seem like a small task, but it can make a big difference in the readability and appearance of your PCB designs. Altium designed the default font specifically for clarity and ease of reading.
Before you can begin designing your PCBs in Altium, ensuring you have the correct font settings in place is important. Altium uses a default font for all text and labels on your PCB, so installing this font on your computer before getting started is important.
Altium Default Font is one of the most popular fonts on the internet, and for a good reason – it’s versatile and attractive. We’ll show you how to install Altium Default font on your computer and use it in your projects. We’ll also discuss some advantages of using Altium Default Font and provide tips on making the most of its features.
History Of Atium Default Font
The history of the Atium default font is fascinating. It all started with the design tool, which allowed the creation of sleek and stylish fonts. The Atium team carefully selected the perfect combination of curves and lines to create a font that would be visually appealing.
They experimented with different board designs and default settings to ensure a seamless user experience. Additionally, they meticulously crafted each library component and its corresponding component footprint, ensuring the font could be effortlessly integrated into various projects.
Features Of Altium Default Font

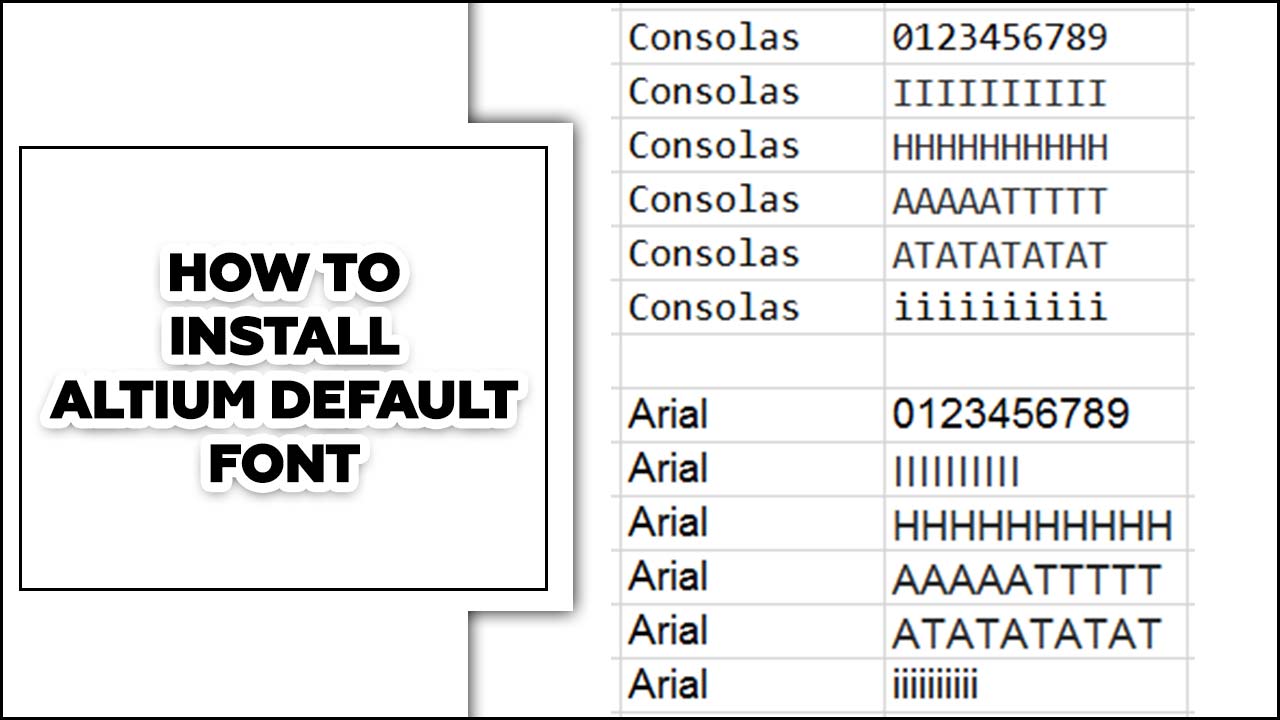
The default font used in Altium is a key feature contributing to its professional and polished design. Altium understands the importance of clear and legible fonts in the PCB design process, ensuring that every detail is easily readable for designers and manufacturers. The default font in Altium possesses several notable characteristics that make it an ideal choice for various applications.
- Altium Default Font: clean and legible typeface
- Modern and professional appearance
- Balanced letterform, clear uppercase/lowercase distinctions
- Supports special symbols and international characters
- Consistent letter spacing and line height
- Optimized for onscreen display
- Minimalistic design, no excessive ornamentation
- Compatible with different operating systems and file formats
- Versatile and professional font option
How To Install Altium Default Font-Follow The Steps Below
The current version of Altium uses the font ‘Segoe UI’ as its default font. This font was chosen for its readability and clarity, making it easier for users to read and understand their designs. However, Altium Default Font is a new font released by Altium and is perfect for creating branding materials, presentations, or even website fonts.
If you’re having trouble installing the font, step-by-step instructions are available online. Adding a cool font to your blog can boost its look and feel. Altium Default Font is a perfect font for doing just that.
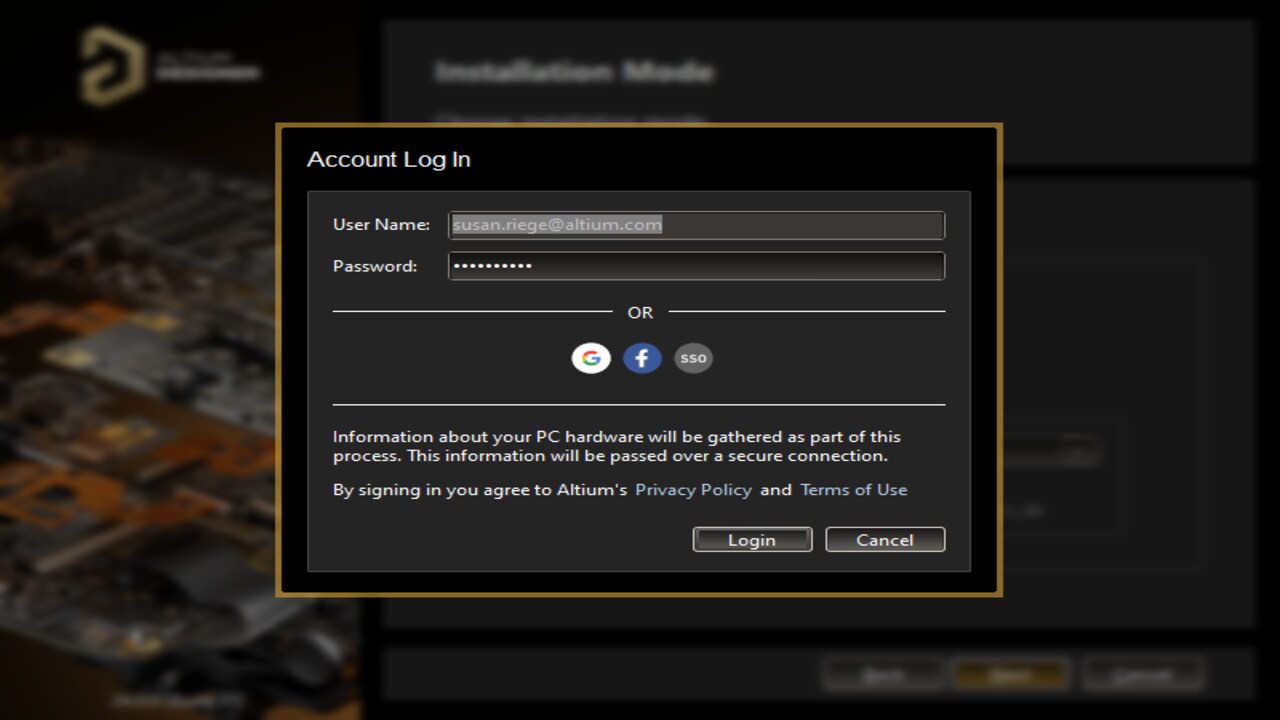
If you’re a designer or an engineer who uses software applications like AutoCAD or Inventor, you’re likely using the Altium Default Font. Use Altium Default Font in software applications, which can be the default installation file to find. Here are some steps on how to install Altium default font.
1. Select Altium Default Font From The Font List
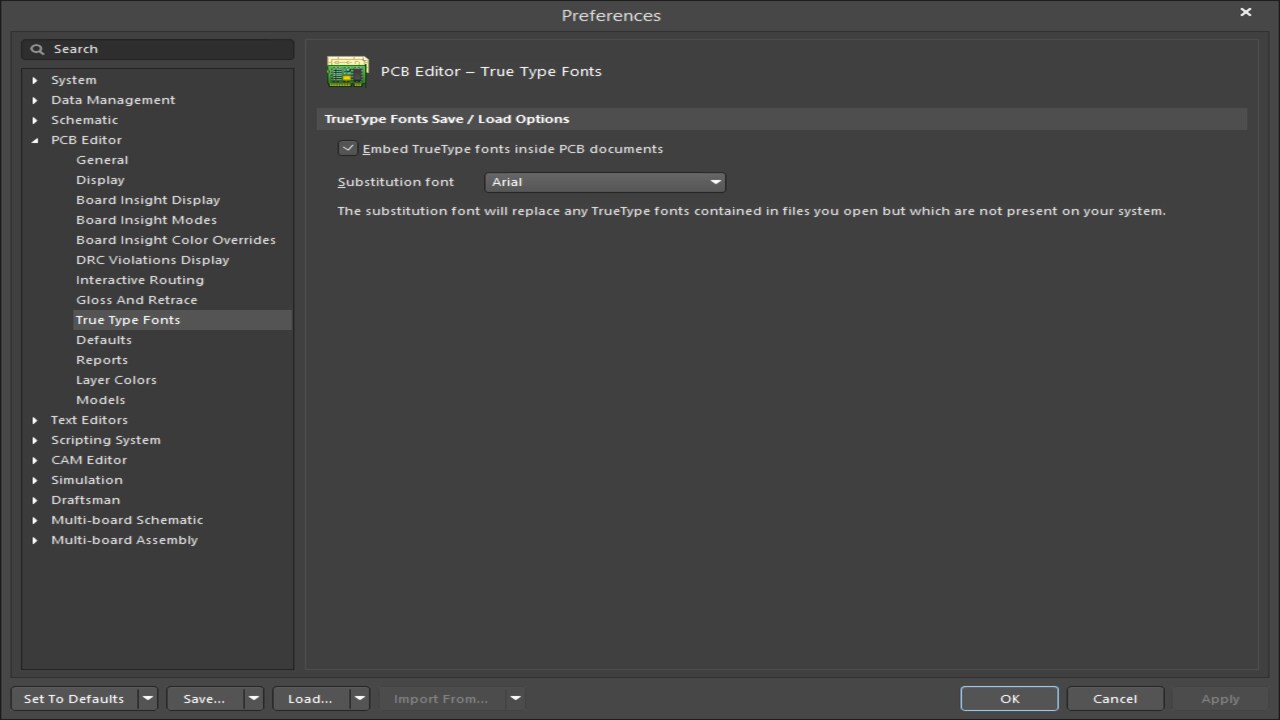
Follow these simple steps to install the Altium default font for better PCB design readability. Open the PCB editor and click “Design” in the top menu. Click “Preferences” and go to the “PCB Editor” tab.
Look for the “Fonts” section and choose “Altium Default” from the dropdown menu next to “Default Font.” This selection will now be your default font for all future PCB designs. This easy customization in Altium enhances the clarity and professionalism of your designs. Another option is accessing the “System Fonts” in the “Preferences” menu to adjust font settings.
2. Install The Font On Your Computer
Altium Designer’s default font, Arial Unicode MS, is chosen for its clarity and readability in schematics, PCB layouts, and design documents. Installing the font ensures consistency and professionalism in your designs. Open a document in Microsoft Word and select the font to check if it’s installed before installing.
If not, follow these steps to uninstall: go to ‘File’> ‘Fonts and Themes,’ click on ‘Install a New Style,’ enter the path to the file (AltiumDefaultFont.ttf), and click OK. Altium default font is versatile for various software applications.
- Download the font and extract it to your computer.
- Open the Windows Fonts folder and double-click on the font file to install it.
- Finally, restart your computer for the changes to take effect.
How To Use Altium Default Font
Altium Default Font is a great font perfect for any blog or website. It has a modern and stylish design that can make your content stand out. Altium Default Font is a great font for any project that requires high-quality type performance. It’s a great option for projects that need to look good both on the web and on mobile devices. Make sure to give it a try and see for yourself. If you want to use the Altium account Default Font on your website or application, follow these easy steps:
- Download the font file from the Altium website
- Unzip the file so you have a font folder inside your project directory
- Copy all of the files in the fonts folder into your project directory
Why Do You Need To Install Altium Default Font?

Installing the default font is crucial for consistent and accurate designs when using Altium. The font has specific designs and is optimized for readability and legibility in small sizes. Without it, your designs may not display properly, leading to errors.
Installing the default font through the Preferences menu ensures accurate and professional-looking designs. Moreover, it saves time and effort in the long run by avoiding adjusting text sizes or formatting with different fonts. Streamline your workflow and focus on other important aspects of your project by installing the essential Altium default font.
Conclusion
It is very important to know how to install Altium default font. Installing the default font in Altium is a quick and easy process that can greatly enhance your experience with the software. By following these simple steps, you can ensure your designs have a consistent and professional look.
With Altium’s default font now properly installed, you can focus on creating high-quality and polished designs without any font-related obstacles. It may seem like a small detail, but maintaining a clean and organized design can make a big difference in the overall quality of your work. With this font installation guide, you can confidently navigate Altium and easily create impressive designs.
Frequently Asked Questions
1.What Is The Default Font In Altium?
Ans: The default font in Altium is Segoe UI. It is a sans-serif font that was first introduced in the Windows Vista operating system and has since been handy in various Microsoft products, including the Microsoft Office suite.
2.Is There A Default Font?
Ans: Yes, there is a default font in most software applications. The software or operating system usually sets a standard font and uses it when no specific font is selected or specified.
3.What Is A Default Font?
Ans: A default font is the pre-set font automatically applied to text in a software or operating system if no other font is chosen. It is the standard font that is handy unless the user specifically selects a different one.
4.Why Is The Default Font 11?
Ans: The default font size 11 is often chosen because it balances readability and space efficiency. It is large enough to ensure that text is clear and legible, particularly for those with visual impairments or when reading on small screens.
5.Is Arial A Default Font?
Ans: Arial is a commonly handy default font in many applications and operating systems. First introduced in 1982 by the monolithic software company IBM, Arial quickly gained popularity for its clean and easy-to-read appearance.

David Egee, the visionary Founder of FontSaga, is renowned for his font expertise and mentorship in online communities. With over 12 years of formal font review experience and study of 400+ fonts, David blends reviews with educational content and scripting skills. Armed with a Bachelor’s Degree in Graphic Design and a Master’s in Typography and Type Design from California State University, David’s journey from freelance lettering artist to font Specialist and then the FontSaga’s inception reflects his commitment to typography excellence.
In the context of font reviews, David specializes in creative typography for logo design and lettering. He aims to provide a diverse range of content and resources to cater to a broad audience. His passion for typography shines through in every aspect of FontSaga, inspiring creativity and fostering a deeper appreciation for the art of lettering and calligraphy.
