The default font in Google Chrome is called “Robot.” Christian Robertson created it for Google, and has been the standard font since 2011. Roboto is a sans-serif typeface known for its clean and modern look, making it readable on various screen sizes.
Here we will walk you through everything you need about the Chrome Default Font. From understanding what it is and why it’s important to step-by-step instructions on modifying it according to your preference. So get ready to give your browsing experience a fresh look with the Chrome Default Font.
Step By Step Instruction- Modifying The Chrome Default Font
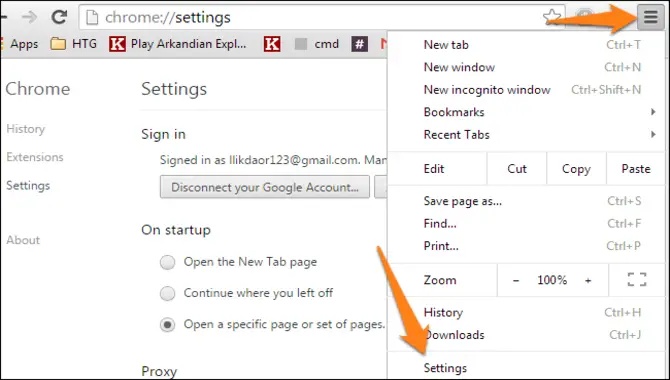
To modify the font in Google Chrome, follow these steps. Open the Chrome browser settings by clicking the menu button and selecting “Settings.” Then, go to the Appearance section and click “Customize fonts.”
Choose the font type, size, and style for headings, fixed-width fonts, and standard text. Preview the changes before applying them, and save the modifications. For more customization options, try browser extensions or themes. Here are some steps:
Open The Chrome Browser Settings
To customize the default font in Chrome, navigate to the browser settings by clicking the three-dot menu icon and selecting “Settings.” Access the “Advanced” section and expand it. In the “Appearance” section, click on “Customize fonts.”
In the font settings tab, you can modify the font type, size, and style for various elements. Choose your preferred font from the “Standard font” drop-down menu to change the default font for web pages. Save the changes to apply the modified font as the default in Chrome.
Find The Appearance Settings
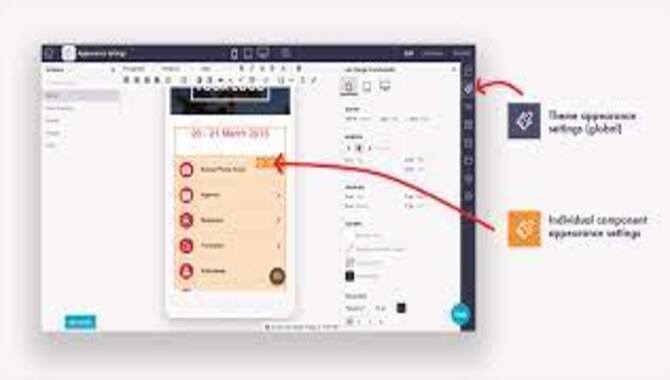
To find the Appearance settings in Chrome, open the browser and access the menu by clicking on the three dots in the top right corner. Select “Settings” from the menu to open the Chrome settings page. Scroll to the “Appearance” section and click “Customize fonts.”
This will open a new window where you can customize various font settings in Chrome, such as the standard font and default font.
Make The Fonts Larger
Increase the font size in Chrome by following these steps: Open the Chrome settings from the three-dot menu icon in the top right corner and select “Settings.” Scroll down and click on “Advanced” to see more options.
Under the “Web content” section, adjust the “Font size” slider to your preference. Customize specific font types and sizes by clicking on “Customize fonts.” Close the settings tab for changes to take effect.
Customize The Fonts
Customizing fonts in Chrome is a straightforward process that allows you to personalize your browsing experience. In order to modify the default font settings, navigate to Chrome’s settings and locate the “Appearance” or “Fonts and Languages” option.
You can choose the font type, size, and style that best suits your preferences. Whether you prefer a sleek serif font or a classic sans-serif, Chrome offers a variety of options to choose from.
Change The Font Styles
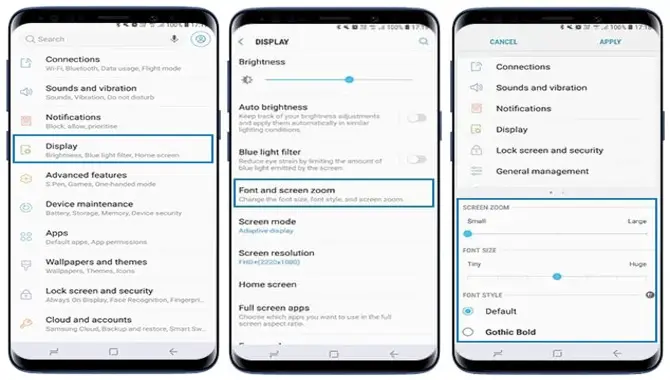
To customize the font styles in Chrome, follow these steps. Begin by opening the Chrome browser and accessing the Settings menu. From there, navigate to the “Advanced” settings and locate the “Web Content” section.
With a click on “Customize fonts,” you’ll access various font settings, including Standard, Serif, Sans-serif, and Fixed-width fonts. Take your time to explore the options and choose a font that suits your preferences. Remember to click “Done” to save your changes.
Why Is The Chrome Default Font Important?
The Chrome default font is important because it determines the appearance of text on websites and web applications. It affects readability, visual appeal, and overall user experience while browsing the internet. Customizing the default font allows users to personalize their browsing experience and enhance their comfort while reading online content.
How To Use The Chrome Default Font?
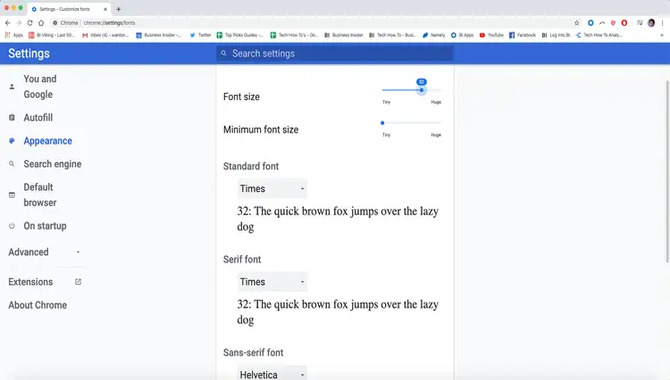
Using the Chrome default font is a simple and straightforward process. To use the default font, follow these steps. Following these steps, you can easily switch to and use the Chrome default font for a seamless browsing experience.
- Open the Chrome browser on your computer.
- Click on the three dots in the browser window’s top right corner to open the Chrome menu.
- From the dropdown menu, click on “Settings.”
- In the Settings tab, click “Appearance” in the left sidebar.
- Under Appearance, you will find an option called “Font size.” Click on it to open a new window.
- In this new window, you will see a dropdown menu labelled “Font family.” Click on it and select “Default” from the list of available fonts.
- Once you have selected the default font, you can adjust its size using the slider below or leave it as is.
- After making any desired changes, close the window, and your settings will be saved.
Conclusion
The Chrome Default Font is the font that is used across all websites and web pages when the website designer has specified no specific font. It provides consistency and a uniform look to web content.
If you want to modify the default font in Chrome according to your preferences, follow our step-by-step instructions. However, keep in mind that changing the default font can affect the readability and appearance of websites. Use it wisely and enjoy a personalized browsing experience.
Frequently Asked Questions
What Is The Default Browser Font?
The default browser font can differ across browsers and operating systems. In Google Chrome, the default font is typically Arial or Times New Roman, but users can customize it in settings. Web designers often choose specific fonts for their websites, so the default font may not always be utilized.
How Do I Change The Default Font In Chrome OS?
To change the default font in Chrome OS, go to Chrome settings by clicking on the three-dot menu and selecting “Settings.” Find the “Appearance” section and click on “Customize fonts.” From there, you can adjust the default font for elements like standard text, serif, sans-serif, and fixed-width. Choose your preferred font and make any necessary adjustments to size and style.
How To Change The Google Chrome Default Font?
To change the default font in Google Chrome, open the browser and click on the three-dot menu at the top-right corner. Go to “Settings” and select “Advanced”. In the “Appearance” section, you’ll find the option to change the default font. Click on “Font size and style” and choose your preferred font from the drop-down menu.
What Is The Best Way To Customize My Browser’s Default Font?
Install a font manager extension like Font Changer, Stylish, or Google Fonts for Chrome to customise your browser’s default font. These extensions allow you to choose and apply custom fonts to enhance readability. Experiment with different options until you find the perfect fit for your preferences.
Is There A Way To Change The Default Font?
Yes, you can change the default font in Chrome by accessing the settings and going to “Appearance.” From there, select a different font style and size. However, changing the default font may impact how websites appear and display text.

David Egee, the visionary Founder of FontSaga, is renowned for his font expertise and mentorship in online communities. With over 12 years of formal font review experience and study of 400+ fonts, David blends reviews with educational content and scripting skills. Armed with a Bachelor’s Degree in Graphic Design and a Master’s in Typography and Type Design from California State University, David’s journey from freelance lettering artist to font Specialist and then the FontSaga’s inception reflects his commitment to typography excellence.
In the context of font reviews, David specializes in creative typography for logo design and lettering. He aims to provide a diverse range of content and resources to cater to a broad audience. His passion for typography shines through in every aspect of FontSaga, inspiring creativity and fostering a deeper appreciation for the art of lettering and calligraphy.

